Mystic Cave Portal
A portal in a cave, got inspired by an old project I remembered trying months ago but failed. I started in Blender 2.79 and went to 2.8 after the Retopology. Had big problems and a lit of frustation with the new layout but got used to it quickly.
A new thing I learned:
I tried a new workflow I came up with. It really made this project work very smoothly and easy. I will definetly use this for my future projects!
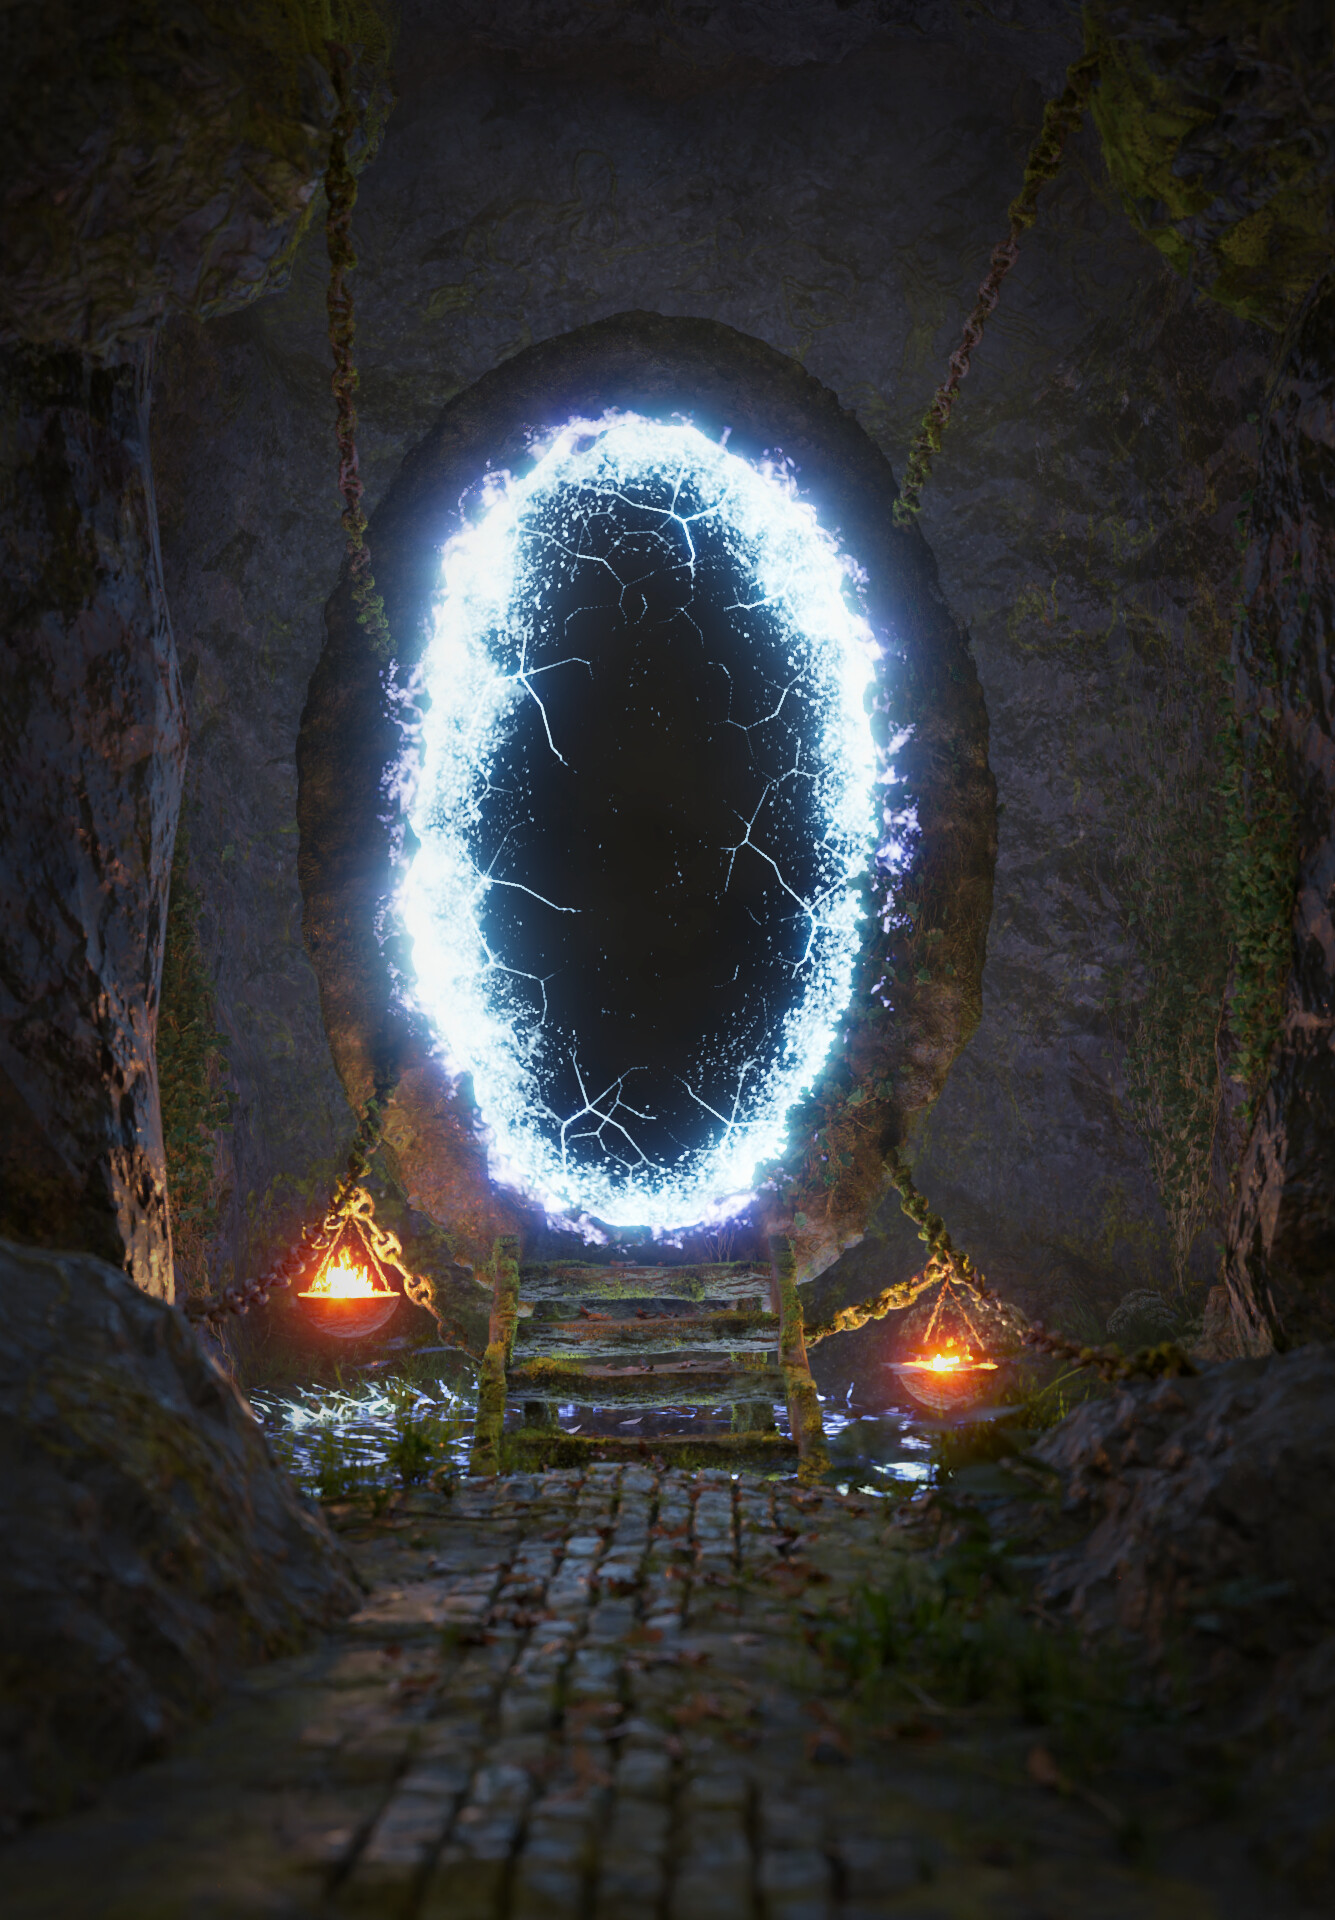
The Final Render:
24 hours of work over 4 days. Using Blender, SubstancePainter and Photoshop,

The Sketch:
Got an imspiration during class, immideatly droped my pen and picked my pencil to draw a quick sketch.

Basic Layout:
As I came home I opened blender and Created the basic layout.

Sculpting:
Based on the Basic Layout I created a high poly sculped version. Here i got multiple new ideas such as a pond under the portal.

Retopology:
It would have been a nigthmare to unwrap/texture/render the high-poly models. So i did a very basic retopology.

Texturing:
I created the textures in SubstancePainter

Assets:
With only the portal and the pond the Image was way to blue, so the addition of the Firepits created little balance of the colors Green,Blue and Red.

Raw Render:
This is the RAW image comming from blender, I was happy with the results so far, now I needed to pimp it up a notch in Photoshop.